If you’re hearing squeaks, feeling uneven braking, or planning a brake job, brake pad hardware is one of the small parts that can make a big difference. It helps brake pads move correctly, reduce noise, and wear evenly. In many cases, you should replace the hardware when changing pads, and sometimes when changing brakes and rotors too. Here’s what brake pad hardware does, when it should be replaced, and how to tell if your setup is still in good shape.
📖 Table of Contents
- What Brake Pad Hardware Is and What It Does
- Why Brake Pad Hardware Matters
- Signs Your Brake Pad Hardware Needs Attention
- When to Replace Brake Pad Hardware
- How to Inspect Brake Pad Hardware
- Brake Pad Hardware vs. Pads and Rotors: What to Replace Together
- Rear Brakes: Special Things to Watch For
- Common Mistakes to Avoid During a Brake Job
- FAQ
- Conclusion
📌 Key Takeaways
- Brake pad hardware includes clips, shims, pins, springs, and abutment parts that help pads fit and move correctly.
- Worn or rusty hardware can cause squeaks, uneven wear, vibration, or sticky brakes.
- Replace brake pad hardware whenever pads are changed if the kit is worn, corroded, or missing pieces.
- Always check your owner’s manual for exact service intervals and brake design details for your vehicle.
What Brake Pad Hardware Is and What It Does
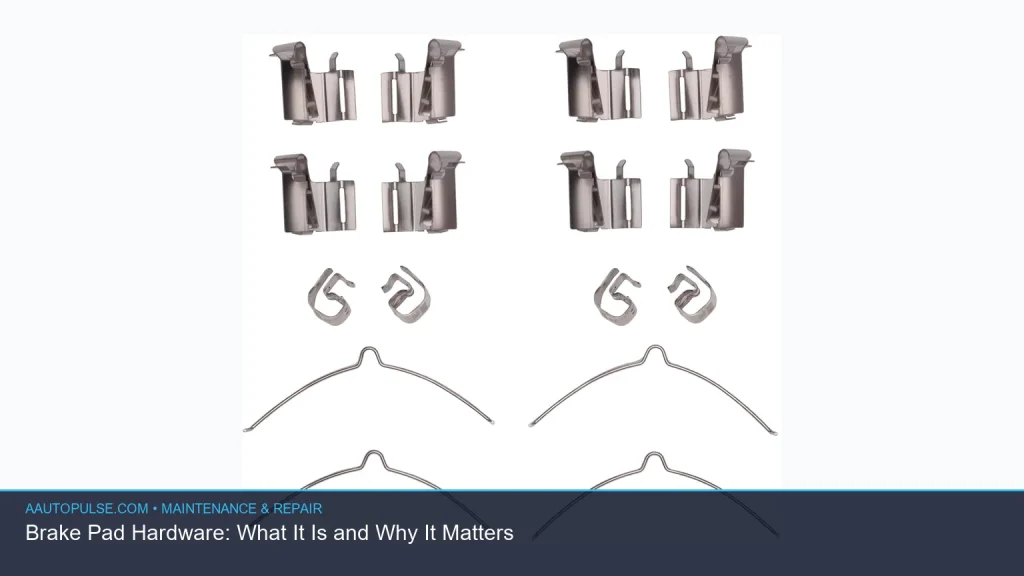
Brake pad hardware is the group of small metal and rubber parts that support the brake pads inside the caliper bracket. These parts are not the pads themselves, but they help the pads sit in the right place and slide when braking. Without them, the pads can bind, rattle, or wear unevenly.
Common brake pad hardware includes abutment clips, anti-rattle clips, pad shims, guide pins, boots, and retaining springs. Some brake systems also use wear indicators or lubricated contact points that work with the hardware. The exact design varies by make and model, so the best reference is always your vehicle’s service guide.
When everything is in good shape, the pads move smoothly, release cleanly, and stay quiet. That helps the braking system work as designed and can also help protect the rotor surface from uneven wear.
Why Brake Pad Hardware Matters
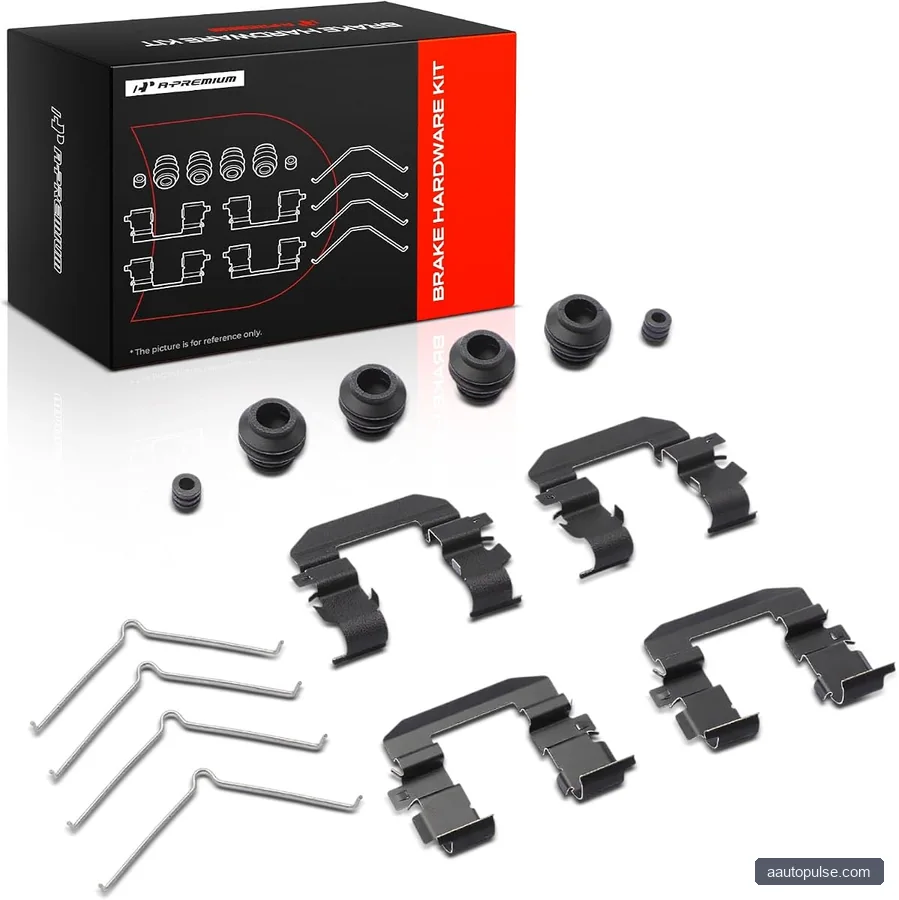
The brakes do more than stop the car. They must also release fully after each stop, and that depends on clean, properly fitted hardware. If the hardware is bent, rusted, or missing, the pads may drag against the rotor or shift too much in the bracket.
That can lead to several common problems. You may hear squealing, clunking, or rattling. You may also feel pulling to one side, a soft pedal, or vibration when braking. In some cases, the brake pedal may feel normal, but the vehicle still stops poorly because the pads are not making even contact.
This matters even more on vehicles used in salt-heavy states or in wet climates, where corrosion can build up faster. Rear brakes can be especially prone to stuck or noisy hardware if the car sits often or is driven short distances. Regular inspection helps catch these issues before they turn into larger repair bills.
Signs Your Brake Pad Hardware Needs Attention
Brake pad hardware does not always fail all at once. Often, the warning signs start small. A quick inspection can reveal whether the problem is the pads, the rotors, or the hardware that supports them.
| Symptom | Possible Hardware Cause | What to Check |
|---|---|---|
| Squeaking at low speed | Worn shims, missing clips, dry contact points | Look for rust, metal-to-metal contact, or missing anti-rattle parts |
| Pulling left or right | Sticky pins or uneven pad movement | Check caliper slide hardware and pad fit in the bracket |
| Vibration or shudder | Uneven pad contact, rotor issues, or loose hardware | Inspect clips, pad seating, and rotor surface |
| Dragging brake smell | Corroded or seized hardware | Check whether pads return freely after braking |
If you notice any of these signs, do not assume the pads are the only issue. In many cases, the hardware is part of the root cause. A proper brake inspection should include both the pads and the mounting points that hold them.
When to Replace Brake Pad Hardware
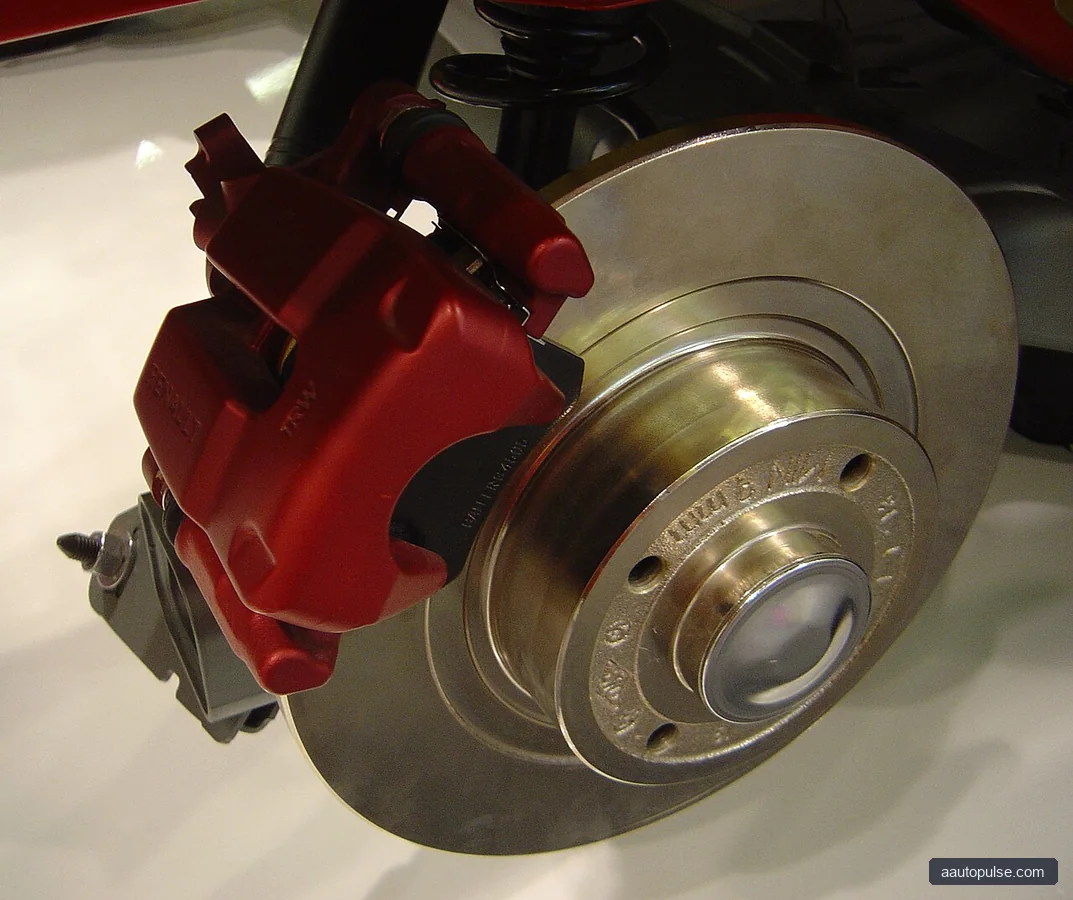
In most brake services, the safest choice is to replace brake pad hardware whenever the old parts are corroded, bent, cracked, or loose. Many pad kits include new clips and shims for this reason. Even if the old hardware still looks usable, age and heat can weaken spring tension and reduce its ability to hold the pads correctly.
A common rule of thumb is to inspect hardware every time the brakes are serviced, often around every 25,000 to 50,000 miles depending on driving style, climate, and brake use. Heavy stop-and-go driving, mountain roads, towing, and winter road salt can shorten that window. Your owner’s manual should always guide the service interval for your specific vehicle.
If you are also changing brakes and rotors, it often makes sense to replace the hardware at the same time. New rotors and pads can still perform poorly if the clips are rusty or the pads cannot slide evenly in the bracket. That is why many technicians treat hardware as part of the full brake service, not an optional extra.
How to Inspect Brake Pad Hardware
You do not need advanced tools to spot many hardware issues. A flashlight, a safe workspace, and basic hand tools are often enough for a visual check. If you are not comfortable lifting the car or removing the wheels, have a qualified shop inspect the system.
Step-by-step inspection basics
- Park on level ground, set the parking brake, and let the brakes cool fully.
- Remove the wheel so you can see the caliper, bracket, pads, and rotor.
- Check the clips and shims for rust, cracks, bends, or missing tabs.
- Look at the pad edges. They should sit squarely and move freely in the bracket.
- Inspect the guide pins and boots for dryness, tears, or corrosion.
- Make sure the pads do not bind when the caliper is moved by hand.
- Confirm that all hardware matches the brake design and is installed correctly.
Use only brake-safe grease where the service manual allows it, and never get lubricant on the pad friction material or rotor surface. Too much grease can trap dirt and create new problems. If a part looks questionable, replace it rather than trying to reuse a worn clip or spring.
Brake Pad Hardware vs. Pads and Rotors: What to Replace Together
Brake repairs are often more effective when related parts are replaced as a set. That does not mean every component must always be replaced at once, but it does mean the condition of each piece should guide the decision. Pads, rotors, and hardware all affect the same stopping system.
| Part | Replace When | Strengths | Limitations |
|---|---|---|---|
| Pads | Worn thin, noisy, glazed, or contaminated | Restores stopping power and friction | New pads may still squeak if hardware is worn |
| Rotors | Warped, scored, below spec, or rusted beyond service limits | Improves smooth braking and pad bedding | Will not fix a sticking caliper or bad clips |
| Hardware | Rusty, bent, loose, missing, or heat-damaged | Helps pads move freely and reduces noise | Won’t help if pads or rotors are already worn out |
Who should choose what: If your pads are worn and the hardware looks clean, you may only need pads and an inspection. If the rotors are thin or damaged, replace rotors too. If the clips, shims, or pins are rusted or weak, replace the brake pad hardware at the same time for the best result.
Rear Brakes: Special Things to Watch For
Rear brakes often wear differently than the front brakes because they carry less stopping force. Still, they can cause major issues if the hardware is corroded or installed badly. Rear brake hardware can be especially important on vehicles with parking brake mechanisms integrated into the rear caliper.
Rear brake symptoms can include a dragging parking brake, uneven pad wear, or a grinding sound after the vehicle sits for a while. In some cases, the rear pads may look okay but still fail to retract properly because the clips or pins are sticking. That can shorten pad life and hurt fuel economy.
If your rear brakes use a special parking brake design, take extra care to install the hardware exactly as intended. A small mistake in spring placement or clip orientation can cause noise or uneven braking. If the setup seems unclear, compare it with the service diagram for your exact model.
Common Mistakes to Avoid During a Brake Job
Brake work is detail-driven. One missed clip or dry contact point can undo a lot of effort. Careful installation helps the new parts perform as expected and makes the repair last longer.
- Reusing rusted or weak hardware because it “still looks okay.”
- Applying grease to the pad face, rotor, or friction surfaces.
- Mixing old clips with new pads without checking fit.
- Ignoring guide pins, boots, or bracket corrosion.
- Failing to verify torque specs from the owner’s manual or service guide.
After the repair, test the brakes at low speed in a safe area first. Listen for new noises and confirm the pedal feels normal. If you notice pulling, grinding, or a burning smell, stop and inspect the system again.
FAQ
Do I really need new brake pad hardware with every brake job?
Not always, but it is often the best choice if the hardware is rusty, worn, or missing. Many brake kits include new hardware because fresh clips and shims help the pads fit and move correctly. When in doubt, replace questionable parts rather than reusing them.
Can bad hardware cause brake noise even if the pads are new?
Yes. New pads can squeak, rattle, or wear unevenly if the hardware is not holding them properly. Dirty bracket surfaces, weak clips, and dry guide pins are common causes of noise after a brake service.
How often should brake hardware be inspected?
Inspect it any time you replace pads, rotors, or calipers. As a general guide, many drivers end up checking brake parts every 25,000 to 50,000 miles, but that can change based on driving habits and climate. Always follow the maintenance schedule in your owner’s manual.
Are rear brake hardware parts different from front brake hardware?
Often, yes. Rear brakes may use different clip shapes, shim designs, or parking brake-related parts. That is why it is important to use hardware that matches your exact brake system, especially on the rear brakes.
What if the rotor is fine but the pad hardware is rusty?
If the rotor is still within spec and has a good surface, you may only need pads and hardware. But if the old hardware has damaged the pad alignment or caused uneven wear, inspect the caliper and rotor carefully before reassembly. A clean rotor cannot fix a sticky brake bracket.
Conclusion
Brake pad hardware may be small, but it plays a big role in safe, quiet, and even braking. If you are servicing your brakes, do not overlook the clips, shims, pins, and springs that support the pads. Inspect them closely, replace worn parts, and check your owner’s manual before you decide what needs to be renewed.
If you are planning a brake job soon, start with a full inspection of the pads, rotors, and hardware together. That simple step can help you avoid noise, uneven wear, and repeat repairs.